
封面来源:幻想郷の夏遊び | syuri22 #pixiv https://www.pixiv.net/artworks/84241955
最近在 Telegram 上关注了一些 Google Drive 资源分享群组,白嫖固然很香,但是 Google Drive 并不支持诸如一些国内网盘的一键转存的功能,而且转存大量资源也会受到大小的限制,而 Google Drive 百宝箱正好能够完美满足在下对大量 Google Drive 资源的转存需求。另外,它还支持使用 Telegram Bot 进行操作,非常方便。
安装并配置宝塔面板和 Web
在下使用的是 CentOS 系统,在 ssh 中输入以下命令安装。
1 | yum install -y wget && wget -O install.sh http://download.bt.cn/install/install_6.0.sh && sh install.sh |
安装好宝塔面板后,根据提示安装 web 环境,推荐 LNMP。然后在宝塔面板软件管理中安装 PM2 管理器。
最后,在宝塔面板里新建一个网站,并填写上解析好的域名。
在站点设置中申请好 Let’s Encrypt 的 SSL 证书。
安装 Google Drive 百宝箱服务和依赖
在 ssh 中输入命令克隆项目到本地。
1 | git clone https://github.com/iwestlin/gd-utils && cd gd-utils |
再安装依赖。
1 | npm i |
配置 Service Account
这里要用到 AutoRclone 来利用 Service Accounts 来替代普通 Google 账号进行拷贝/上传。
安装 python 依赖及 Rclone 主程序
在 ssh 终端输入以下命令:
1 | yum update |
1 | curl https://rclone.org/install.sh | sudo bash |
生成 Service Account
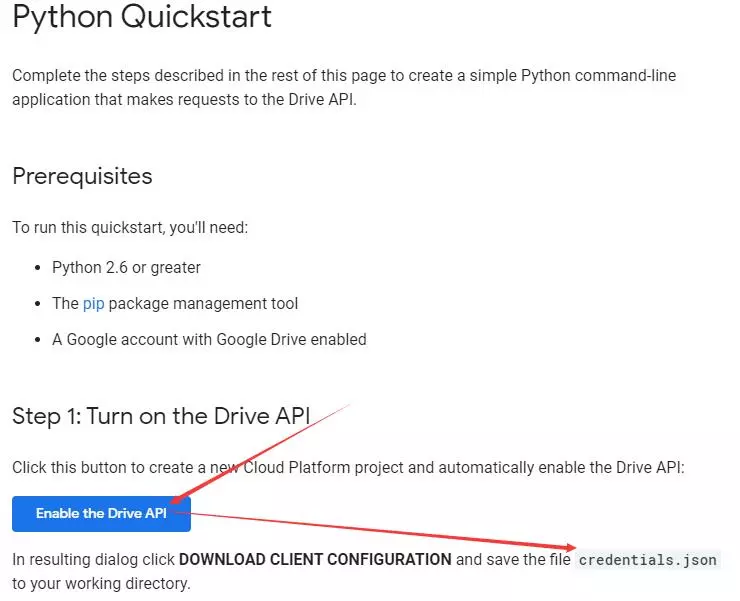
首先,开启 Drive API 并在宝塔文件管理里将 credentials.json 上传到服务器的 root/gd-utils/AutoRclone 目录当中。
切换到 AutoRclone 目录。
1 | cd /root/gd-utils/AutoRclone/ |
如果你之前没创建过项目,则直接在 ssh 中输入命令:
1 | python3 gen_sa_accounts.py --quick-setup 1 |
- 创建 1 个项目
- 开启相关的服务
- 创建 100 个 service accounts
- 将 100 个 service accounts 的授权文件下载到 accounts 文件夹下面
100 个 SA = 750GB*100 = 75T,一天就能转存 75T 的资源。
如果你已经有 N 个项目,现需要创建新的项目并在新的项目中创建 service accounts,则在 ssh 中输入命令:
1 | python3 gen_sa_accounts.py --quick-setup 2 --new-only |
- 额外创建 2 个项目(项目 N+1 到项目 N+2)
- 开启相关的服务
- 创建 200 个 service accounts(2 个项目,每个项目 100 个)
- 将 200 个 service accounts 的授权文件下载到 accounts 文件夹下面
如果你想用已有的项目来创建 service accounts(不创建新的项目),则在 ssh 中输入命令:
1 | python3 gen_sa_accounts.py --quick-setup -1 |
注意这会覆盖掉已有的 service accounts。
接着打开给出的链接授权。
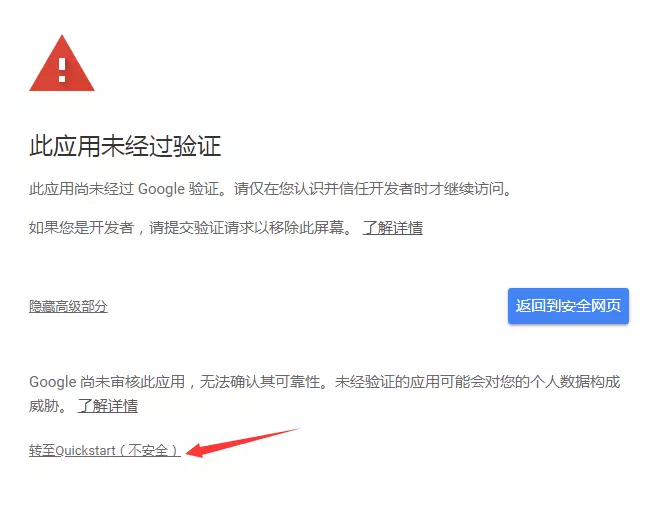
授权并复制 code 到 ssh 终端。
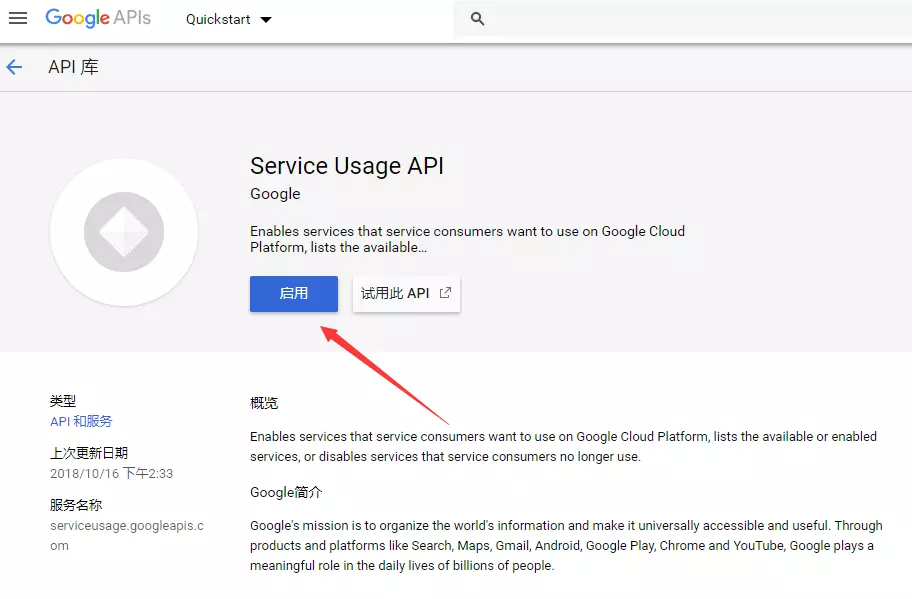
第一次会遇到 Service Usage API 服务未开启的情况,这时ssh会给出网址,打开并启用 Service Usage API 即可。
顺利完成后,AutoRclone 文件下面的 accounts 文件夹下会有很多的 json 文件。
将 Service Accounts 加入共享云端硬盘(选做)
为了更好地管理创建的 SA,可以选择将它们加入 Google Groups,以此将 Google Groups 加入谷歌团队盘中,实现将资源转存入谷歌团队盘。
首先,在 Google APIs 中找到项目及 SA。
看到凭据处,点击进入找到每个 SA 账号所对应的邮箱地址。
创建一个 Google Group ,将 service accounts 对应的邮箱地址挨个添加进去,每次只能添加 10 个,以西文逗号「,」作为两个邮箱之间的间隔,每 24 小时只能添加 100 个,并记住此 Group 的邮箱地址。
最后,前往谷歌共享云端硬盘,在管理成员的选项中通过输入邮箱地址的方式添加好刚刚建立的 Google Group。
复制 Service Accounts
在 ssh 终端执行以下命令:
1 | cd /root/gd-utils/AutoRclone/accounts/ |
接着回到 SA 目录,检查 SA 是否被成功复制。
1 | cd /root/gd-utils/sa |
若返回了 SA 的 json 文件的列表,则表示 SA 被成功复制了。
配置个人帐号
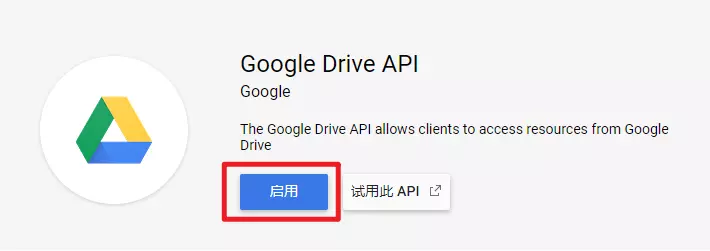
首先,要启用 Google Drive API
获取 client_id 与 client_secret
创建 OAuth client ID,首次创建会要求配置同意屏幕,填写应用名称后直接保存即可,应用类型选择其他。
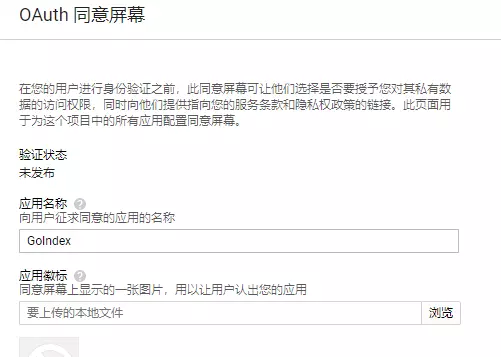
接着就可以看到客户端 ID client_id 和客户端密钥 client_secret,复制并保存好。
获取 refresh_token
在 ssh 输入以下命令执行 Rclone 的账号配置:
1 | cd /root/gd-utils |
根据提示绑定 Google Drive。
1 | $ rclone config |
接着,在 ssh 执行以下命令:
1 | cat /root/.config/rclone/rclone.conf |
此时应该可以看到 client_id,client_secret 和 refresh_token 这三个变量,随后在宝塔文件管理里找到服务器中 /root/gd-utils/config.js 这个文件,使用编辑把这三个变量分别对应填入其中,需要注意的是这三个值必须被成对的英文引号包裹,且引号后以英文逗号结尾。
如果 rclone.conf 里没有 client_id 和 client_secret,说明配置 rclone 的时候默认用了 rclone 自己的 client_id,连 rclone 官方都不建议这样做,因为大家共享了它的接口调用限额,在使用高峰期可能会触发限制。
最后在 ssh 中输入命令:
1 | node check.js |
如果返回了谷歌硬盘(注意,非团队盘)根目录的数据,则说明配置成功。
配置 Telegram Bot 及站点
首先在 Telegram BotFather 那里根据指示创建一个新机器人并拿到该 bot 的 token,然后再将之填入 config.js 中的 tg_token 变量当中,接着在 tg_whitelist 变量当中根据提示填入自己的 Telegram 用户名。
回到宝塔面板,在安全选项中添加 23333 端口放行。
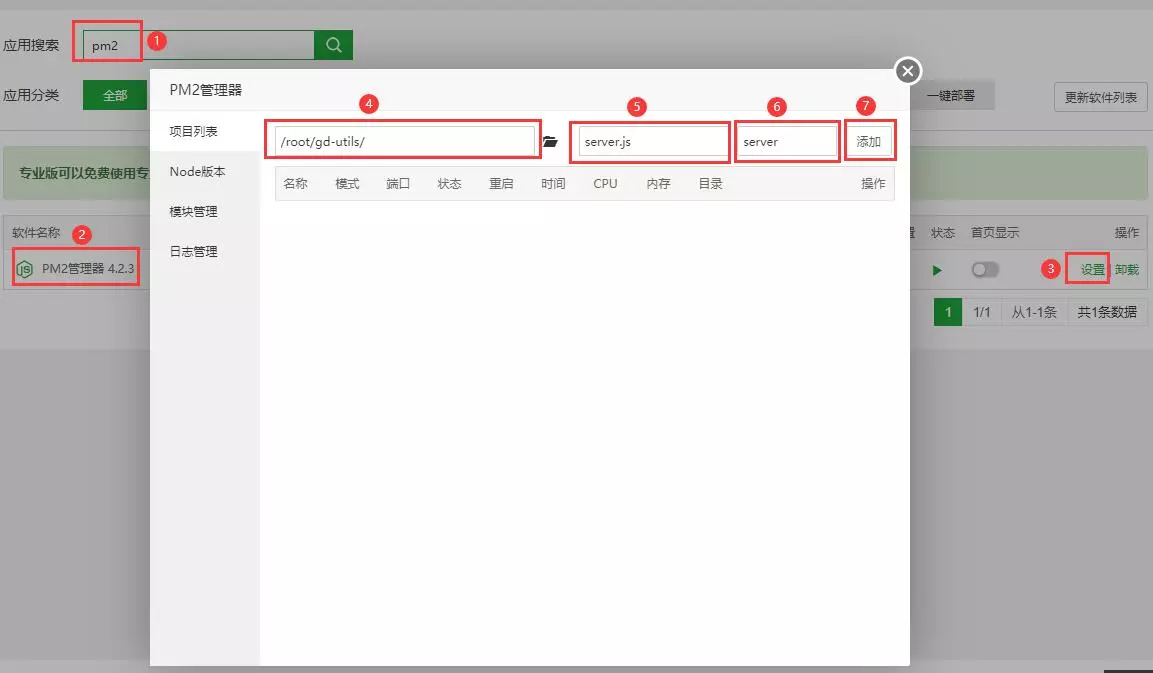
然后在 PM2 管理器中添加以下项目自动运行。
此时,回到安全选项,可以看到 23333 端口正在使用中。
接着,在网站配置里添加反向代理,目标 URL 填 http://127.0.0.1:23333 ,站点就配置完成。
继续回到ssh终端输入以下命令(将 YOUR_WEBSITE_URL 替换成自己的网址):
1 | curl 'YOUR_WEBSITE_URL/api/gdurl/count?fid=124pjM5LggSuwI1n40bcD5tQ13wS0M6wg' |
如果返回了 gd-utils 成功启动的信息,便说明部署成功了。
最后,在ssh终端输入以下命令(将 YOUR_WEBSITE 和 YOUR_BOT_TOKEN 分别替换成自己的网址和 bot token):
1 | curl -F "url=YOUR_WEBSITE/api/gdurl/tgbot" 'https://api.telegram.org/botYOUR_BOT_TOKEN/setWebhook' |
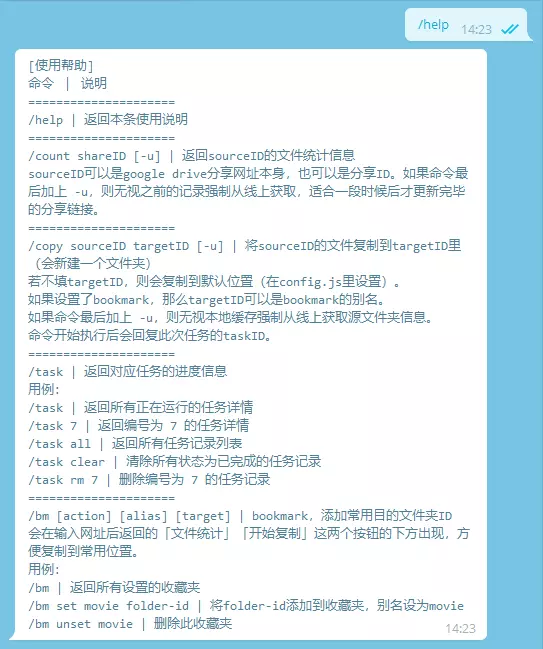
如此一来,便将服务器连接上了 Telegram bot,这时,给bot发送 /help ,如果它回复了使用说明,便说明 bot 配置成功了。
无效 SA 清理
如果在使用途中遇到了以下几种问题,说明 SA 目录下混杂了没有权限的 json 文件。
- 任务异常中断
- 命令行日志无限循环输出但进度不变
- 复制完发现丢文件或文件夹没有正确地被创建
这些情况会发生在 SA 没有对应目录的阅读权限的时候。 当进行 server side copy 时,需要向 Google 的服务器提交要复制的文件 ID 和复制的位置,也就是新创建的目录 ID,由于在请求时是随机选取的 SA,所以当选中没有权限的 SA 时,这次拷贝请求没有对应目录的权限,就会发生以上错误。
以下是解决办法:
1 | cd /root/gd-utils |
程序会读取 SA 目录下所有 json 文件,依次检查它们是否拥有对你的目录 ID 的阅读权限,如果最后发现了无效的 SA,程序会提供选项允许用户将无效的 SA json 移动到特定目录。
最后,别忘记重启 PM2 进程。
1 | pm2 reload server |